Saturday, March 1, 2014

Coconut-Key Lime Pie

Since I don’t do this very often, just sit back and enjoy this ride because we are going on a trip. A trip in our minds.  I’m going to tell you a story about Key Lime Pie, and I will even let you sit in my big green reading chair in the corner.  Now, not everyone can sit in the chair at once. I would hate to break something so ugly, yet so comfortable.
Here we go!


 *Cue dream harp music*


Given the fact that the first Key Lime Pie I ever tasted was made by my mother would make one wonder why I ever tried another one. J  Now, if you know my mother, you are probably re-reading that first sentence, but let me assure you, you did read it correctly. My mother made a pie!  It was her first and last.  Now, if you are from somewhere in Latvia, Japan, or Sweden, you might not find this funny, but don’t worry. Just laugh and keep reading.  Hey Latvia!  Still wondering why I have such a big following in your country? Whatever…back to my story about my mother’s pie. It is almost too hard to type since it is such a foreign concept. Anyhoo…it was green!  Yes, green!  Let me stop my story again for a second and create a short list of random things I know in no particular order: 
  1. Potty-training a child should come with a Congressional Medal of Honor upon completion.  If you train more than one child in your lifetime you should have a party thrown in also.
  2. Spraying Pam Cooking Spray on wet fingernails after they have just been freshly polished really does make them dry instantly.  However, I will caution you not to use butter flavored because it will make you oddly hungry and weirdly nauseous the rest of the day.
  3. Key Lime Pies should NEVER be GREEN! Like ever! It is just wrong. Feel free to use the comments section below if you would like to debate me on the issue. Another caution, I will win.  I have the ultimate “delete comment” button.  J
So, off we go again. It is a good thing that I don’t do road trips like I tell stories because we would never reach our destination at this rate. 
Aside from the pie being terribly green and having an Oreo crust…get this…wait for it, wait for it... it was Low-FAT!!!  What?!?!  Why would someone do that to one of the best pies EVER! Therefore, it goes without saying, or in my case, saying way too long, that I have been on a quest for a good Key Lime Pie ever since.  I have tried many kinds, but this one stood out for its creative use of flavors. 
I was looking one day on Martha’s website around *clears throat* Easter 2013.  I know that was months ago, but my pictures have been held hostage on Husband’s camera and the ransom was too large for my budget.  I wondered what could be better than coconut married with lime.   
*Put the Lime in Coconut ….. Everyone sing with me now….*


As I was gathering the ingredients at the big box store down the road I found myself wandering around for one can (13.5 ounces) unsweetened coconut milk.  Hey kids this is NOT Coco Lopez!!! Go about nine aisles over to the Asian Food section and grab a can of coconut milk.  It will be on the top shelf in the back and you will have to find someone with long monkey arms to reach it or do like me and climb onto the bottom shelf and get dirty looks from the senior citizens.  Now, if you have never used coconut milk from a can you will be amazed when you open the lid.  It is the consistency of Crisco or jarred hand cream sitting on top of a half of a can of cloudy water.  They will warn you on the label that separation can occur.  No worries, heat will fix this problem. Bake the pie as directed because we all know that Martha’s recipes are thoroughly tested and accurate or someone will lose their head.


Are you enjoying this little journey?  I know I am, however, we are now at our final stop.  Taste.  Sometimes when you marry two flavors you find that they become one.  Not in this case.  It is like a husband and wife with two checking accounts, both too strong and independent to merge completely.  First, you get the coconut flavor without the bothersome hairy texture.  Then the lime comes in on the tail end right when you think the flavor experience is coming to a close and the lime has been all but forgotten.   Kinda like this blog post because it is finally coming to a close.  Good day!

Coconut-Key Lime Pie
from Martha Stewart

Ingredients for crust:
6 ounces cookies (about 12 graham crackers, or 46 vanilla wafers)
3 tablespoons sugar
1/4 teaspoon salt
5 tablespoons unsalted butter, melted

Ingredients for filling:
1 can (14 ounces) sweetened condensed milk
1 can (13.5 ounces) unsweetened coconut milk
1/3 cup fresh or bottled Key lime juice
7 large egg yolks
Whipped Cream for topping

Directions:
Preheat oven to 325 degrees. In a medium bowl, whisk together condensed milk, coconut milk, lime juice, and egg yolks until smooth. Pour into crust and bake until set but still slightly wobbly in center, 40 minutes. Let cool on a wire rack, 1 1/2 to 2 hours, then refrigerate 3 hours (or up to 1 day).  Top with whipped cream.

Directions for homemade crust:
Preheat oven to 350 degrees. In a food processor, pulse cookies until finely ground (you should have about 1 1/2 cups). Add sugar, salt, and butter and pulse until combined. Firmly press crumb mixture into bottom and up sides of a 9-inch pie plate. (If using a springform pan, press crumbs halfway up sides.) Bake until crust is dry and set, about 12 minutes. Let cool completely in plate on a wire rack before filling. Use a dry, flat-bottomed glass or your fingers to press crumbs into the pie plate, forming a firm layer.

Thursday, December 20, 2012

Mud Hens

Well, well, look who decided to post something after 2 years! 
So, shall we get started? Mud Hens. What are Mud Hens? Beats me. But, the better question would be, are they delicious? The answer is yes! Sweet, buttery, brown sugar goodness with a bit of saltiness. Think Kettle Corn or a Werther’s Original candy. Yum. Simple to make and no mixer involved. No mixer! Yay! Let us all take a moment for one less thing to wash…….. Okay, you can continue reading now.
Where did the name come from? After careful research I discovered that no one really knows. What I do know is that the name is also used for a minor league baseball team located inToledo, Ohio and a bird found in a marsh. If you know, please leave a comment.
Now, before someone out that goes crazy about my version of the recipe, I would like to point out that I know there is a different one involving marshmallows and chocolate chips. I also know that it is terribly southern and I live in the greatest state in the South, but I also live in an almost marshmallow free house where they are looked down upon and spoken badly of for their less than food like qualities. Don’t get me wrong, I would never say this but others have unless it is Thanksgiving and Fluff Salad is involved but I digress.

Moving on….
I would now like to share a few things that I have learned during my 2 year hiatus.
1. The statistic is somewhat true that Americans only bake 4.5 times a year. I bake more than that but it is not far off.
2. When you have a 6 year and a 3 year old you are only asked to bring/bake two things to school. Shaped sugar cookies with sprinkles and cupcakes with a ring stuck on top. Being slightly quirky *cough, cough*, I had a hard time buying store bought cupcakes. A really hard time. (Disclaimer: No one said they had to be store bought. Those came with said rings that 6 year old wanted.) I must confess that I bought them, took the rings out, baked my own, and stuck the rings in mine. Yes, I’m nuts. But, if I’m going to be a nut I would really like to be a walnut. At least they are loaded with Omega-3’s.
3. Baking powder really does settle in the bottom of the can from lack of use.
4. Baking 151 dessert recipes in a year was really kinda mean to my family. I’m sorry that you all became pre-diabetics. Hope you are enjoying my new hobby of reading until my eyeballs fall out. This one should really not affect your health as much as it is affecting mine. J
5. I have learned other things that I either do not feel like sharing or I don’t remember. A 6 year old and a 3 year old will do that to you. 
So now the big question that you all are dying to ask is if this post is the beginning of many more to look forward to in the weeks to come? Shoot no, I have 37 books on“my shelf” to read. But hey, if nothing else you never know when I might pop up.

 
Mud Hens
Courtesy of CookieClubRecipes.com
Ingredients:
2 sticks butter
1 c. granulated sugar
1 c light brown sugar, firmly packed
2 large eggs, well beaten
2 c. self-rising flour
1 c. pecans (I used walnuts)
2 tsp. pure vanilla

Directions:
Preheat oven to 300 degrees. Melt butter and add sugars. Blend well by hand (no mixer). Add beaten eggs, stir well. Add self-rising flour and stir until all lumps are gone, just until blended. Add pecans and vanilla. Turn out into a greased and floured 9x13-inch baking dish. Spread with fingers or a spatula dipped in water to cover dish. Bake approximately 40 to 50 minutes being cautious not to over cook. When cool, cut into squares and enjoy!


Sunday, June 20, 2010

Tahiti Blondies

If you are a regular FoodNetwork watcher of the show Throwdown you might have heard of this Blondie by another name. In this particular Blondie episode, the challenger made Tahiti Blonde Sweeties. Ring a bell? I had wanted to make this dessert for a long time but never took time to find the recipe. I found this copycat recipe on cookiemadness.net a few weeks ago and just had to make it for Mr. Man’s family birthday party. Can you believe he is one? I know, me either. Anyhoo, these were really wonderful right out of the oven. Made me feel like I was sitting on a beach in a sunny destination. If you put one up to your ear you can hear the ocean.:)
Things to note. The description in the recipe for the toothpick test was brilliant. Very accurate. Next time I will not press so much juice out of the pineapple. I got a little over zealous and I guess I thought I was dealing with frozen spinach instead of canned pineapple and it was a little too dehydrated and got lost in the flavors. Finally, now you might want to brace yourself for this one, it had too much coconut. I know, such a shocker coming from the coconut queen but it was leaning too much towards macaroon for me. So I suggest loosely packing it in the measuring cup. Other than that I give it two thumbs up!


Tahiti Blondies
1 3/4 cups flour
1 1/2 cups light brown sugar
1 tsp baking powder
1/2 tsp salt
3/4 cup unsalted butter, room temperature
2 large eggs
2 tsp vanilla
1 cup macadamia nuts, lightly toasted and coarsely chopped
1 1/2 cups sweetened shredded coconut
1 cup Hershey’s white chips
8 oz can of unsweetened crushed pineapple, drained, and pressed dry
Preheat the oven to 350 degrees. Line a 9 x 13 pan with parchment or non-stick foil.
Mix flour, baking powder, and salt and set aside. In a separate bowl, cream together the butter and brown sugar. Add the eggs one at a time, mixing well after each addition. Add the vanilla. Blend in the flour mixture, then the coconut, nuts, pineapple, and chips. Do not over mix or the blondies will be more like chocolate chip bars.
Spread the batter in the prepared pan. Bake for about 25 minutes or until a toothpick test gives a moist crumb. Do not over bake. Let cool, lift from pan, cut into bars.

Friday, April 30, 2010

Mandarin Orange Pineapple Cake

My mother went to a baby shower last month and had this cake which she raved about for 10 minutes or so on the phone to me the next day. Now, just because my mother raves about something for 10 minutes doesn’t really mean anything. She can go on and on about nothing for at least a good half hour. What can I say, it just one of her many talents.  I have never tried the cake until now for two reasons. First, mandarin oranges rank up there with raisins on my husband's very short list of foods he does not like. Secondly, I have made an attempt on this cake before, different recipe, and it was simply awful. So, my first thought was to get the recipe that she tried but I did not have time and instead went online and did the best I could.
When I asked my mother what the cake was like she told me her piece was the size of her plate, the cake was light and soft and the frosting was very light and fluffy. So, from these clues I knew a few things. 1. The cake must have been made with at least 4 eggs because the layers were tall. 2. Oil must have been the fat used instead of butter because oil makes a cake mix light, fresh tasting and soft. Finally, the frosting must have been made with Cool-Whip because sweetened whipped cream would have had a hard time remaining stable for that long.
Funny thing, all the recipes I found were pretty much alike but different from what I tried before. My mistake was going the self-rising flour route before which will mess you up every time if you are looking for something light and airy. Self-rising flour should be reserved for hearty things like bread, coffee cake, and cobbler in my opinion.
The cake was wonderful! Just as my mother had described it. I will say that it needs to sit in the refrigerator at least a day before serving. It was much better the second day once all the flavors had time to meld together.


Mandarin Orange Pineapple Cake
from COOKS.COM
1 pkg.yellow cake mix
1 (11 oz.) can mandarin oranges with juice
3/4 c. oil
4 eggs
FROSTING:
1 (13 1/2 oz. or 16) Cool Whip
1 (3 oz.) pkg. vanilla instant pudding
1 (20 oz.) can crushed pineapple
Mix cake mix with mandarin orange with juice and oil. Add eggs one at a time and mix well. Grease and flour 3 (8 inch) cake pans. Divide batter evenly into 3 pans. Bake at 350 degrees for 20-25 minutes minutes. Cool thoroughly.
Mix Cool Whip, pudding and crushed pineapple with some juice. Return to refrigerator for 10 minutes. Frost cake and keep in refrigerator.

Sunday, January 10, 2010

Hill Country Peach Cobbler

Even though I don’t take the time to blog anymore, I felt the need this weekend to join that crazy little thing called Facebook. I know, it caught me in a weak moment. I said I never would because I’m not a clutterbug and a blog and Facebook would be too much for me. I did it anyway. I have found it to be a blessing and a curse. If you are a Facebook person you will know what I mean. I’m not sure that living in a perpetual high school/family reunion is such a great idea but it is fun to see people all grown up. Let me just say, the “Wall” thing is very scary and overwhelming and jumbles my mind. I think that is why I like blogging, it is very peaceful. I’m the only one who gets to talk.
So, speaking of blogging, let us get down to today’s business, Hill Country Peach Cobbler. I have made this recipe for about 9 years now. How do I remember such an odd number? Well, I have been married for 9 years as of last week and I made this our first year together because my husband is a lover of peach cobbler with a pastry crust. This is a good and easy recipe. The only drawback is the price of ingredients. If you shop where I do, you will have to buy 4 bags of peaches. Once you finish taking out a bank loan for your grocery bill you still have to go home and make it. That is the easy part if you follow one simple rule. Use a BIG pot. Now, don’t go crazy and pull out one so big that you have to use an oar to stir it but make sure it is a proper size. I did not use a big enough pot the first time and peaches went flying. I felt like a failure. The rest is very straight forward. The result is a lot like a yummy peach pie in the summertime. I found this recipe in the Texas Ranger Cookbook. At the time it was only one of three cookbooks we owned. We have added a few more over the past 9 years!


Hill Country Peach Cobbler
INGREDIENTS:
8 c peeled and sliced fresh peaches or frozen peaches, thawed
2 c sugar
3 Tbsp flour
½ tsp ground nutmeg
1/3 c melted butter
2 - 9-inch unbaked pie crust
DIRECTIONS:
Preheat oven to 475 degrees.
In large pan, combine peaches, sugar, flour and nutmeg. Bring to a boil and cook over low heat for 10 minutes or until tender. Remove from the heat and add butter. Spoon half of the peaches into a 9x13 inch buttered baking dish and top with a pie crust. Bake for 12 minutes or golden brown. Remove from oven and spoon remaining peaches over baked crust. Cut remaining pastry crust in ½ inch strips. Arrange in lattice design over peaches.
Brush strips with melted butter and sprinkle with sugar. Return to oven for 10-15 minutes. Serves 8.

Thursday, December 17, 2009

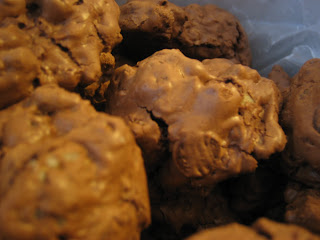
Chocolate Chubbies


Chocolate Chubbies
6 (1-ounce) semisweet chocolate squares, chopped
2 (1-ounce) unsweetened chocolate squares, chopped
1/3 cup butter
3 large eggs
1 cup sugar
1/4 cup all-purpose flour
1/2 teaspoon baking powder
1/8 teaspoon salt
2 cups (12 ounces) semisweet chocolate morsels
2 cups coarsely chopped pecans
2 cups coarsely chopped walnuts
Combine first 3 ingredients in a heavy saucepan; cook, stirring often, over low heat until chocolate melts. Remove from heat; cool slightly.
Beat eggs and sugar at medium speed with an electric mixer until smooth; add chocolate mixture, beating well.
Combine flour, baking powder, and salt; add to chocolate mixture, stirring just until dry ingredients are moistened. Fold in chocolate morsels, pecans, and walnuts.
Drop batter by tablespoonfuls 2 inches apart onto lightly greased baking sheets.
Bake at 325° for 12 to 15 minutes or until done. Cool cookies on baking sheet 1 minute. Remove to wire racks; cool. Yield: 3 1/2 dozen

Cake Balls


Cake Balls
1 boxed cake mix (cook as directed on box for 13 X 9 cake)
1 can frosting (16 oz.)
1 package almond bark (regular or white chocolate)
wax paper
1. After cake is cooked and cooled completely, crumble into large bowl.
2. Mix thoroughly with 1 can of frosting. (It may be easier to use fingers to mix together, but be warned it will get messy.)
3. Roll mixture into quarter size balls and lay on cookie sheet. (Should make 45-50.)
4. Chill for several hours. (You can speed this up by putting in the freezer.)
5. Melt chocolate in microwave per directions on package.
6. Roll balls in chocolate and lay on wax paper until firm. (Use a spoon to dip and roll in chocolate and then tap off extra.)
Melt a few pieces of chocolate bark at a time because it starts to cool and thicken. It’s easier to work with when it’s hot.